
AWS is the actual market leader for Public Cloud Storage Service and one of OrientDB’s trusted Cloud Providers. It enables you to have the computational power and storage space that you need on-demand, paying only for the time that you use resources. If you plan a long-term use, you can purchase reserved instances to save money.
In this way you can use OrientDB on AWS for proof-of-concept or production applications, with zero effort to set up an OrientDB instance.
Prerequisites
The only prerequisite needed to launch OrientDB intances on AWS is to create a Key Pair.
Installation
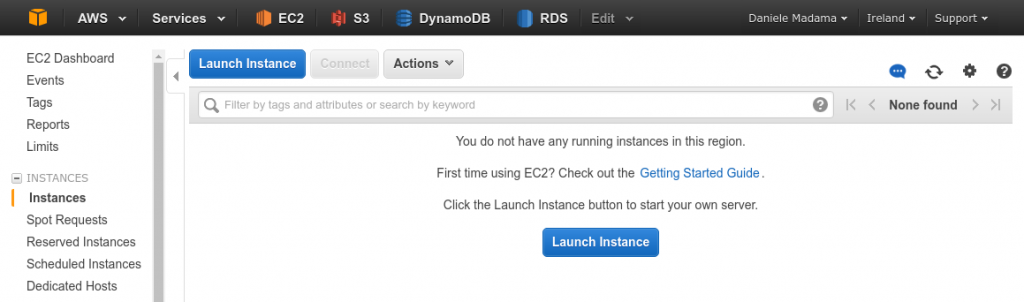
First of all, sign up in AWS and go to the EC2 Console. Then click on “Launch Instance”.
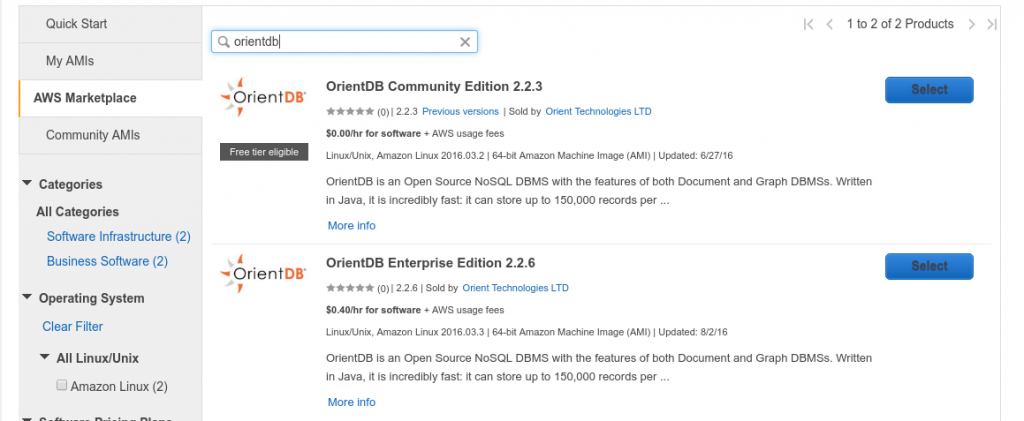
On the left choose “AWS Marketplace” and search for “orientdb”, you will find both Community Edition and Enterprise Edition, choose the right one for you.
In the product page, click the “Continue” button on the bottom right.

From this point on, you are in the wizard to launch instances, so choose your preferred settings. In the storage page, pay attention to disk sizes:
- The first one is 8GB by default and it is used only by the OS, OrientDB engine and logs. We suggest to leave this as is.
- The second one is 1GB by default and it’s used to store database data. Pick enough size to store your database(s). The default type is General Purpose SSD, if you need more performance use Provisioned IOPS SSD. For more info read here.

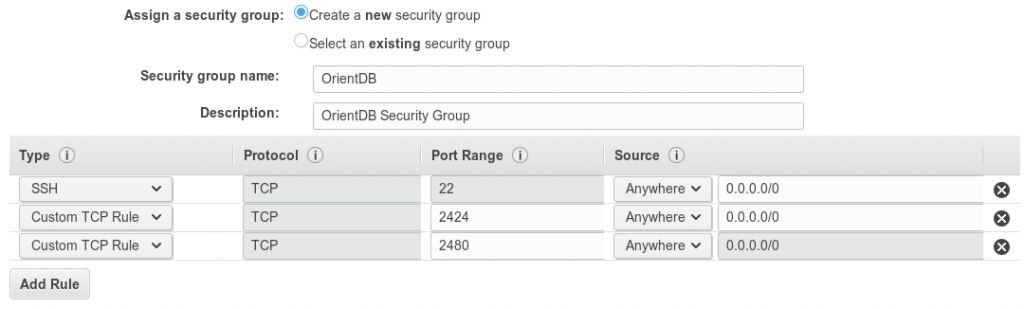
Move forward with the wizard till the Security Group configuration. Here you can create a new security rule like adding the TCP ports 2424 (OrientDB binary protocol) and 2480 (OrientDB HTTP protocol) in addition to 22 (SSH).
Complete the wizard and launch the instance. You will receive an email in which you accept the software license. Remember that there is no additional fee for Community Edition other than the instance one charged by AWS. Please hold until the Public IP is provided, then from instances dashboard, select the instance and copy the Public IP in the clipboard, then paste it into a new tab of your browser and add the port 2480. The address will be something like http://xyz.xyz.xyz.xyz:2480. Hold on a few second for OrientDB Studio to show up, then login.
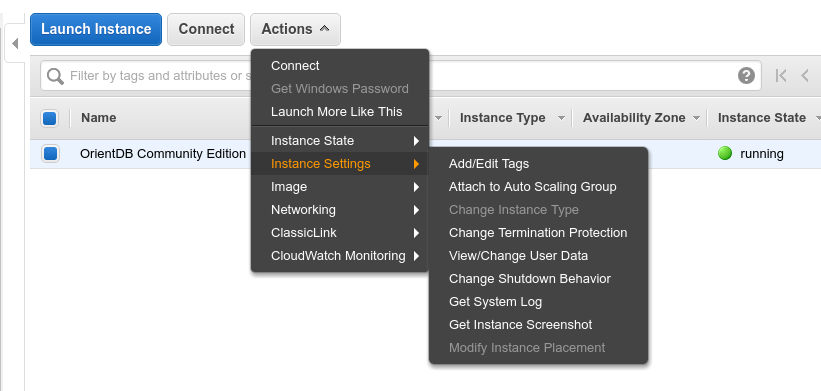
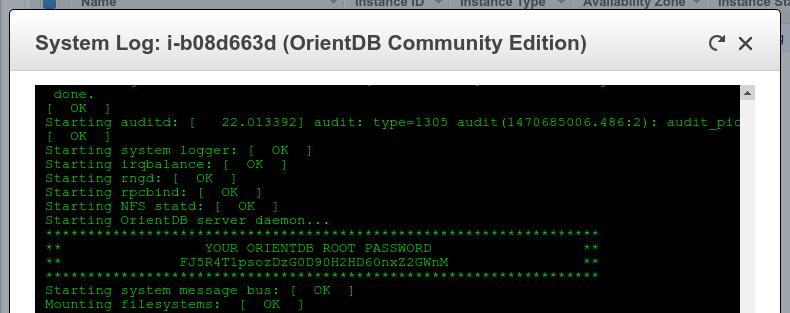
In order to start working with OrientDB, you have to create a new database after logged with the auto-generated root credentials auto-generated. To find the auto-generated password, go back to EC2 dashboard and select your instance, then from menu Actions -> Instance Settings -> Get System Log.
Browse the log file and look for “YOUR ORIENTDB ROOT PASSWORD” (this is the only place where you can read it, be aware that after some restart this part of log is not available anymore, so write this password on a safe place or change it).
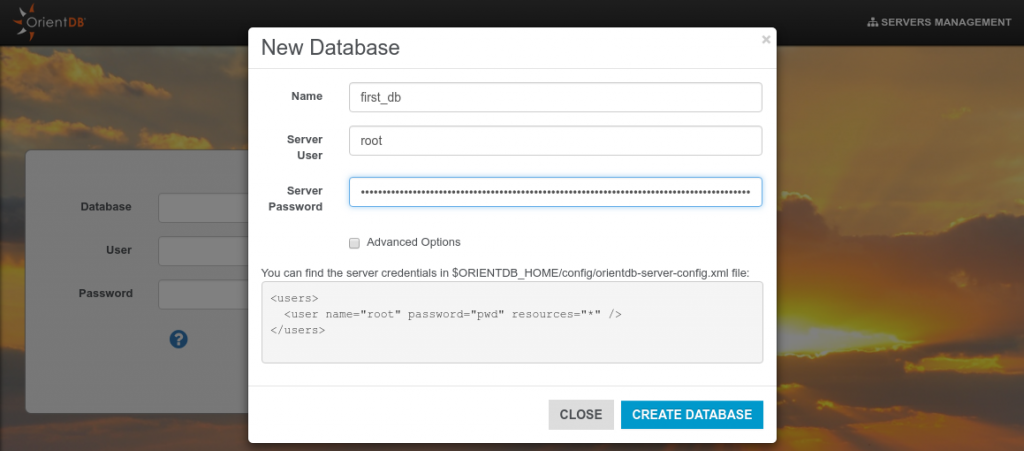
Now go back to your browser and use the password to login as server root and create your first database. Type the database name and paste your password, then click on “Create Database”.
Enjoy! Now you are logged in a fully working instance of OrientDB Community/Enterprise Edition.
If you need further information on how to use OrientDB or would like to know more about our trusted Cloud Providers, take a look at:
Hoping to deploy OrientDB with other Cloud providers? Click here for a list of all officially supported Cloud providers.


